
Fluid Checks Every Driver Should Understand
From coolant to power steering fluid, learn what each vehicle fluid does, how to check levels safely, and what warning signs look like.
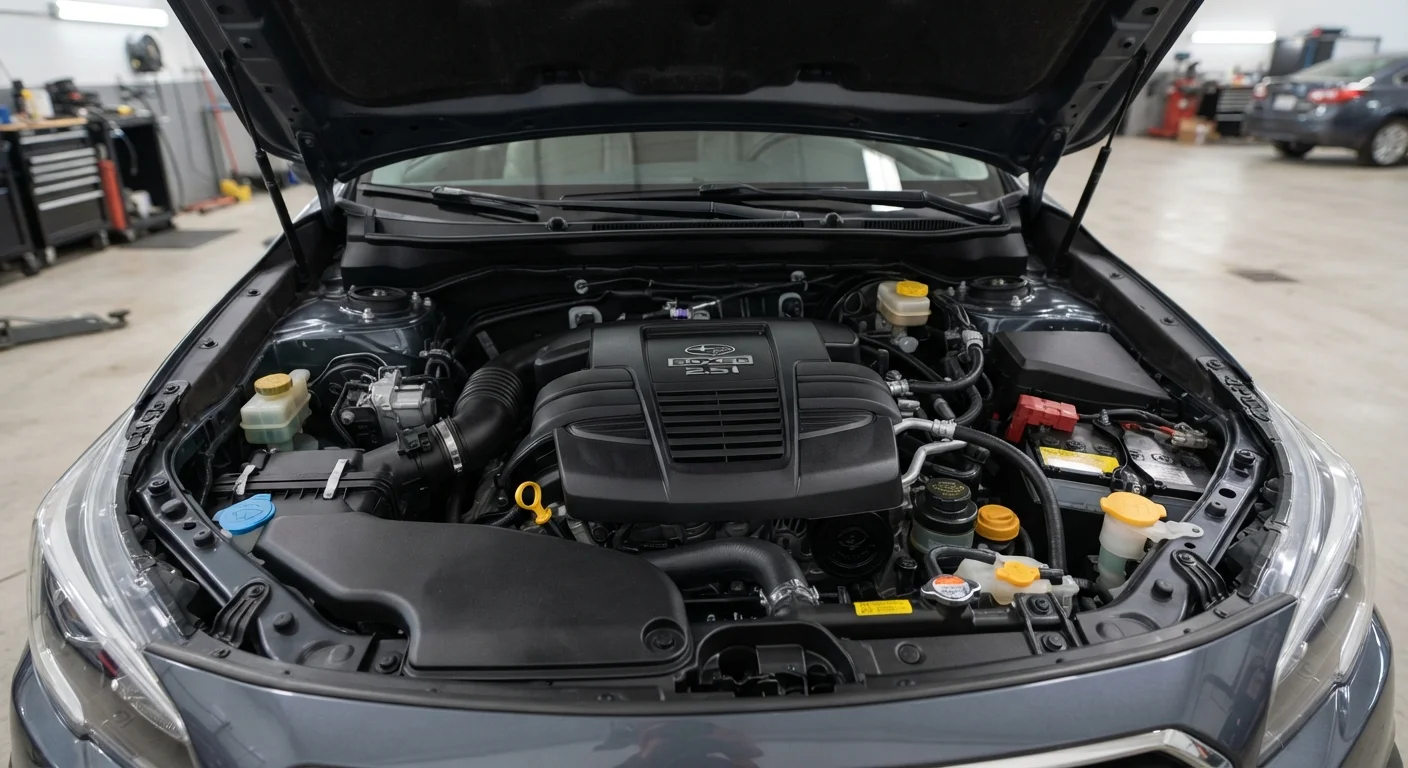
Photo: CoralScripts.com | Explore, Discover, Engage editorial
—— In This Article
Key Takeaways
- Most fluid checks require only a cold engine, a clean rag, and your owner's manual.
- Low or contaminated fluids are among the most common and preventable causes of vehicle damage.
- Each fluid has distinct visual and odor cues that signal when it needs attention.
- Brake fluid and coolant reservoirs must never be opened on a hot engine due to pressure.
- Regular fluid checks support braking performance, transmission longevity, and engine cooling.
Why Fluid Checks Matter More Than Most Drivers Realize
Modern vehicles rely on a network of purpose-specific fluids to protect moving components, transfer force, dissipate heat, and maintain system pressure. When any one fluid drops below safe levels or degrades beyond its usable condition, the consequences can escalate quickly - from premature component wear to complete system failure. Unlike warning lights, which only illuminate after a problem has developed, routine fluid checks let you catch issues at the earliest opportunity.
Most checks take under 20 minutes and require no specialized tools beyond a clean rag and your owner's manual. For drivers preparing for extended travel, fluid checks are a core item in any pre-trip vehicle inspection. They're also a key part of seasonal maintenance routines, since temperature extremes place additional stress on coolant, oil, and brake fluid.
What you will need
What You'll Need Before You Start
Preparation is minimal but important. Ensure the vehicle is parked on level ground and the engine has had sufficient time to cool - this is non-negotiable for coolant and brake fluid checks. Gather your tools before opening the hood.
Owner's Manual
Identifies correct fluid types, reservoir locations, and acceptable level ranges for your specific vehicle.
Lint-Free Rags or Paper Towels
Used to wipe dipsticks clean before re-inserting and to check fluid color and clarity.
Nitrile Gloves
Protect skin from brake fluid and coolant, both of which are chemically aggressive.
Small Flashlight
Helps illuminate reservoir markings and fluid color in tight or shaded engine bays.
If dashboard warning lights are already illuminated, address those first. A warning light guide can help you interpret what the vehicle is already flagging before you begin manual checks.
Step-by-Step Fluid Check Walkthrough
Work through the checks in a consistent order each time - this reduces the chance of skipping a reservoir and builds a reliable habit. The steps below cover the six most critical fluid systems for the majority of passenger vehicles.
Park on a level surface and let the engine cool
Accurate fluid readings depend on the vehicle being stationary and level. An inclined surface causes fluid to pool unevenly, producing false low or high readings. For most fluids, a fully cold engine - at least 30 minutes after shutdown - eliminates hot-expansion errors and removes the risk of burns from pressurized coolant or steam.
Check engine oil with the dipstick
Pull the oil dipstick (usually marked with a yellow or orange ring), wipe it clean, reinsert it fully, then withdraw it again. The oil level should fall between the MIN and MAX markers. Healthy oil is amber to light brown; black, gritty, or milky oil signals contamination and warrants a visit to a mechanic. Milky oil in particular can indicate coolant intrusion - a serious condition.
Inspect the coolant reservoir
The coolant (antifreeze) reservoir is a translucent plastic tank connected to the radiator. Check the level against the COLD MIN and COLD MAX markings on the side - never open the radiator cap or reservoir cap on a warm engine, as the system is pressurized and can release scalding fluid. Coolant should appear bright green, orange, or pink depending on formulation; cloudy or rust-colored coolant indicates degradation.
Check brake fluid level and color
The brake fluid reservoir is typically a small, semi-transparent container near the firewall on the driver's side. Fluid should sit between MIN and MAX lines. Brake fluid is hygroscopic - it absorbs moisture over time - so color is a useful quality indicator: clear to light yellow is acceptable; dark brown signals the fluid has absorbed significant moisture and should be flushed by a qualified technician. Learn how brake fluid works within the broader braking system to understand why degraded fluid affects stopping performance.
Examine power steering fluid (if equipped)
Many newer vehicles use electric power steering and have no fluid to check. If your vehicle has hydraulic power steering, locate the reservoir - often labeled with a steering wheel icon - and check the level using the integrated dipstick or the MIN/MAX markings on the reservoir body. The fluid should be clear to light amber; dark or burnt-smelling fluid indicates breakdown. Stiff or noisy steering at low speeds is a common symptom of low or degraded power steering fluid.
Inspect windshield washer fluid and transmission fluid
Washer fluid is the most straightforward check - the reservoir is clearly marked and simply needs to be filled to the indicated level with an appropriate washer solution rated for your climate. For automatic transmission fluid, many vehicles have a dipstick similar to the engine oil dipstick; others use a sealed system that requires a shop inspection. If accessible, transmission fluid should be red to pink and relatively clear. Brown, burnt-smelling, or cloudy transmission fluid warrants professional attention. For a broader overview of these fluids, see our guide on vehicle fluids beyond engine oil.
Build Checks Into a Monthly Habit
Pairing fluid checks with a monthly task - refueling on a specific day, for example - removes the guesswork from scheduling. Consistent intervals mean you'll catch gradual changes in color or level that a one-off check might miss. Even a quick visual scan of reservoirs takes only a few minutes once you know where to look.
Recognizing Warning Signs Between Checks
Fluid checks done on a schedule are valuable, but some warning signs appear between intervals and shouldn't wait for a scheduled inspection. Watch for these indicators:
- Puddles or stains under the parked vehicle - oil is dark brown to black; coolant is brightly colored and may smell sweet; brake fluid is clear to light yellow and appears near the wheels.
- Unusual odors - burning oil smells like singed metal; overheating coolant has a distinctly sweet, almost syrupy scent.
- Changes in pedal feel or steering effort - a spongy brake pedal or increased steering resistance can both point to fluid issues requiring immediate professional attention.
- Dashboard warning lights - oil pressure, coolant temperature, and brake system lights are direct signals. See our warning light decoder for a full breakdown.
Any sign of a significant leak, a brake warning light, or sudden loss of steering response warrants stopping safely and consulting a qualified mechanic - do not continue driving until the cause is identified.
When to Stop Driving Immediately
If your oil pressure warning light illuminates while driving, pull over safely as soon as possible and shut the engine off. Continuing to operate a vehicle with critically low oil pressure can cause catastrophic engine damage within minutes. Similarly, a rising coolant temperature gauge or a brake warning light combined with a soft pedal are both reasons to stop and seek professional assistance rather than continue to your destination.

Cars & Driving Editorial Team
Cars & Driving Editorial Team is the collective byline for our editorial team and contributor network. Articles published under this byline or an editorial pen name are researched, written, and reviewed according to our editorial standards for clarity, consistency, and independence before publication.
View author profile